If you’re missing direct custom domain mapping integration via Load Balancer in Cloud Run when deploying server-side GTM, you’re not alone. When you want to host a tagging server on your subdomain, Google recommends using a global external Application Load Balancer.
The good news? I’ve written a shell script that simplifies the process of connecting a custom domain via a Google Cloud Load Balancer. With it, you can:
- Create a new Load Balancer setup for server-side GTM.
- Add new domains to a previously created setup.
# Do you want to quickly deploy server-side GTM on Google Cloud Run? Check my previous blog # post.
‼️ Disclaimer: Use this script at your own risk. Load Balancers are paid services on Google Cloud. I’m not responsible for any incurred costs or misconfigurations.
Step-by-step guide
1. Open your Cloud Run project
Go to the GCP Console and open the project where your sGTM Cloud Run instance is deployed. Launch Cloud Shell and ensure you’re in the correct project.
2. Run the script
Copy and paste the following command into the Cloud Shell and press Enter:
bash -c "$(curl -fsSL https://raw.githubusercontent.com/selnekovic/sgtm-load-balancer-shell-script/main/load_balancer_shell.sh)"Follow the on-screen instructions and provide the required information:
- Domain: The custom (sub)domain you want to map.
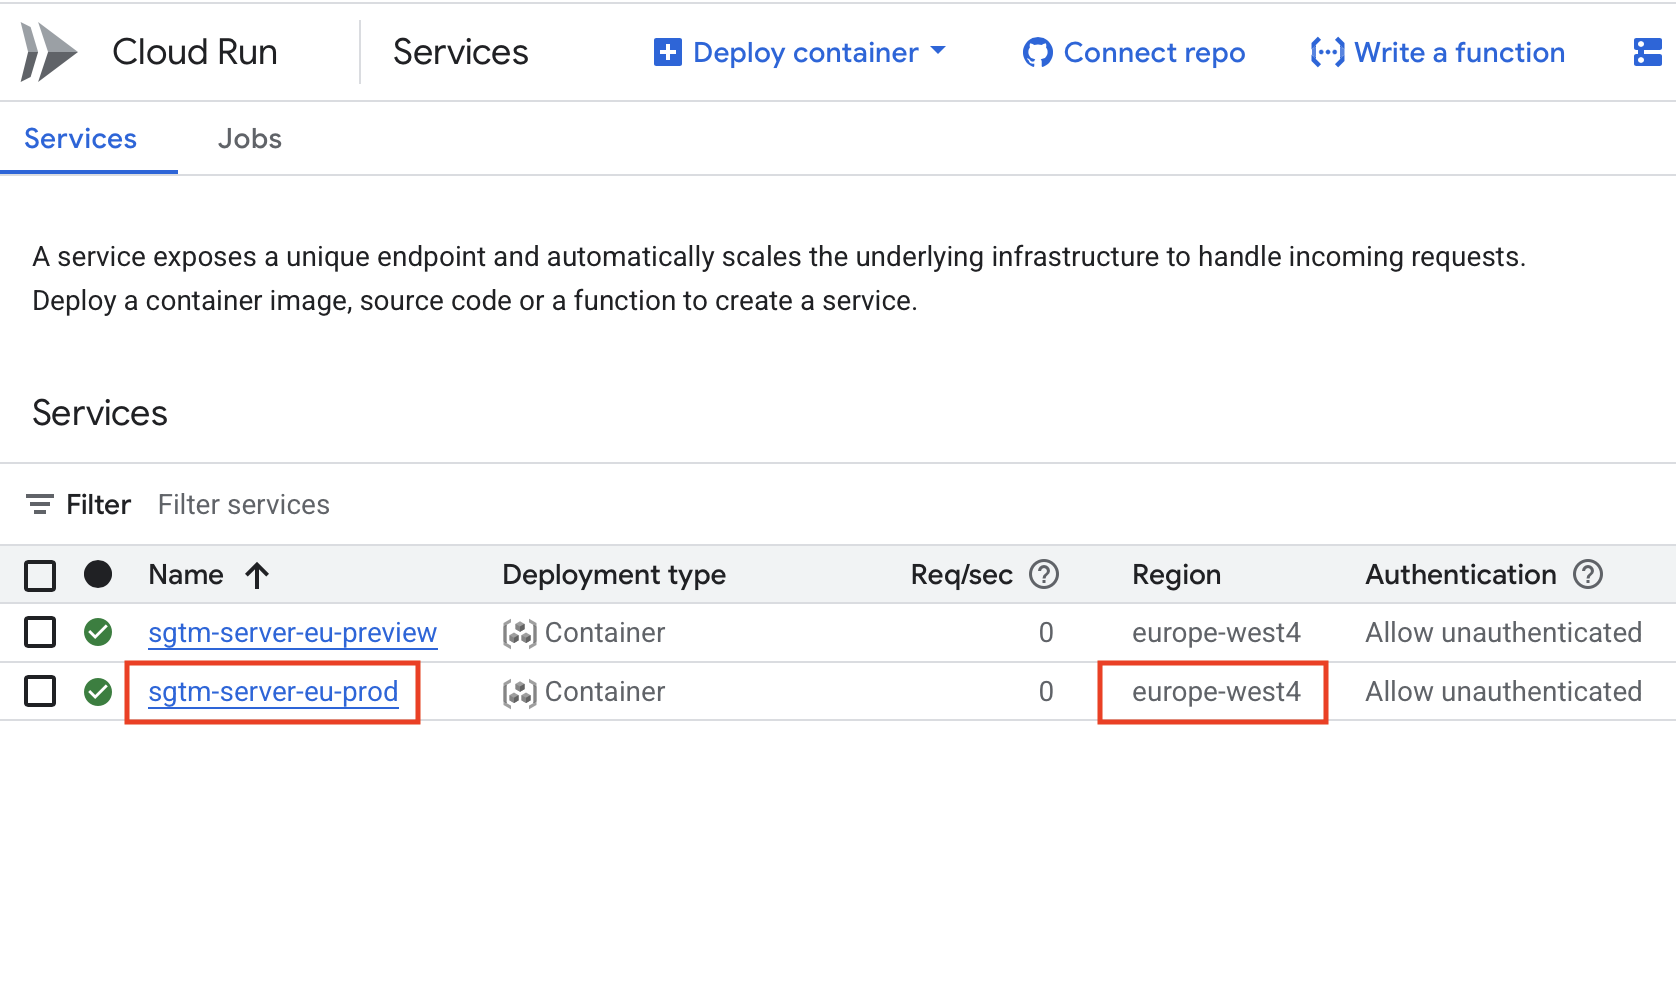
- Backend Service Name: This is the name of your production sGTM Cloud Run server.
- Region: The region where your Cloud Run service is deployed.
You can find both the backend service name and region in your Cloud Run dashboard.

Sometimes, due to latency or internal errors, Google Cloud may fail to complete a command. If that happens, simply run the script again with the exactly same settings. Previously created components will be skipped (you will see bunch of errors), and only the missing parts will be created.
3. Create a new Load Balancer
On the next screen, select Option 1: Create a new Load Balancer.
After deployment, copy the generated IP address and add it to your domain’s DNS records as an A record. After the IP address is added, it usually takes less than 30 minutes for it to become active and for sGTM to start.

(Optional but recommended) Add fallback routing
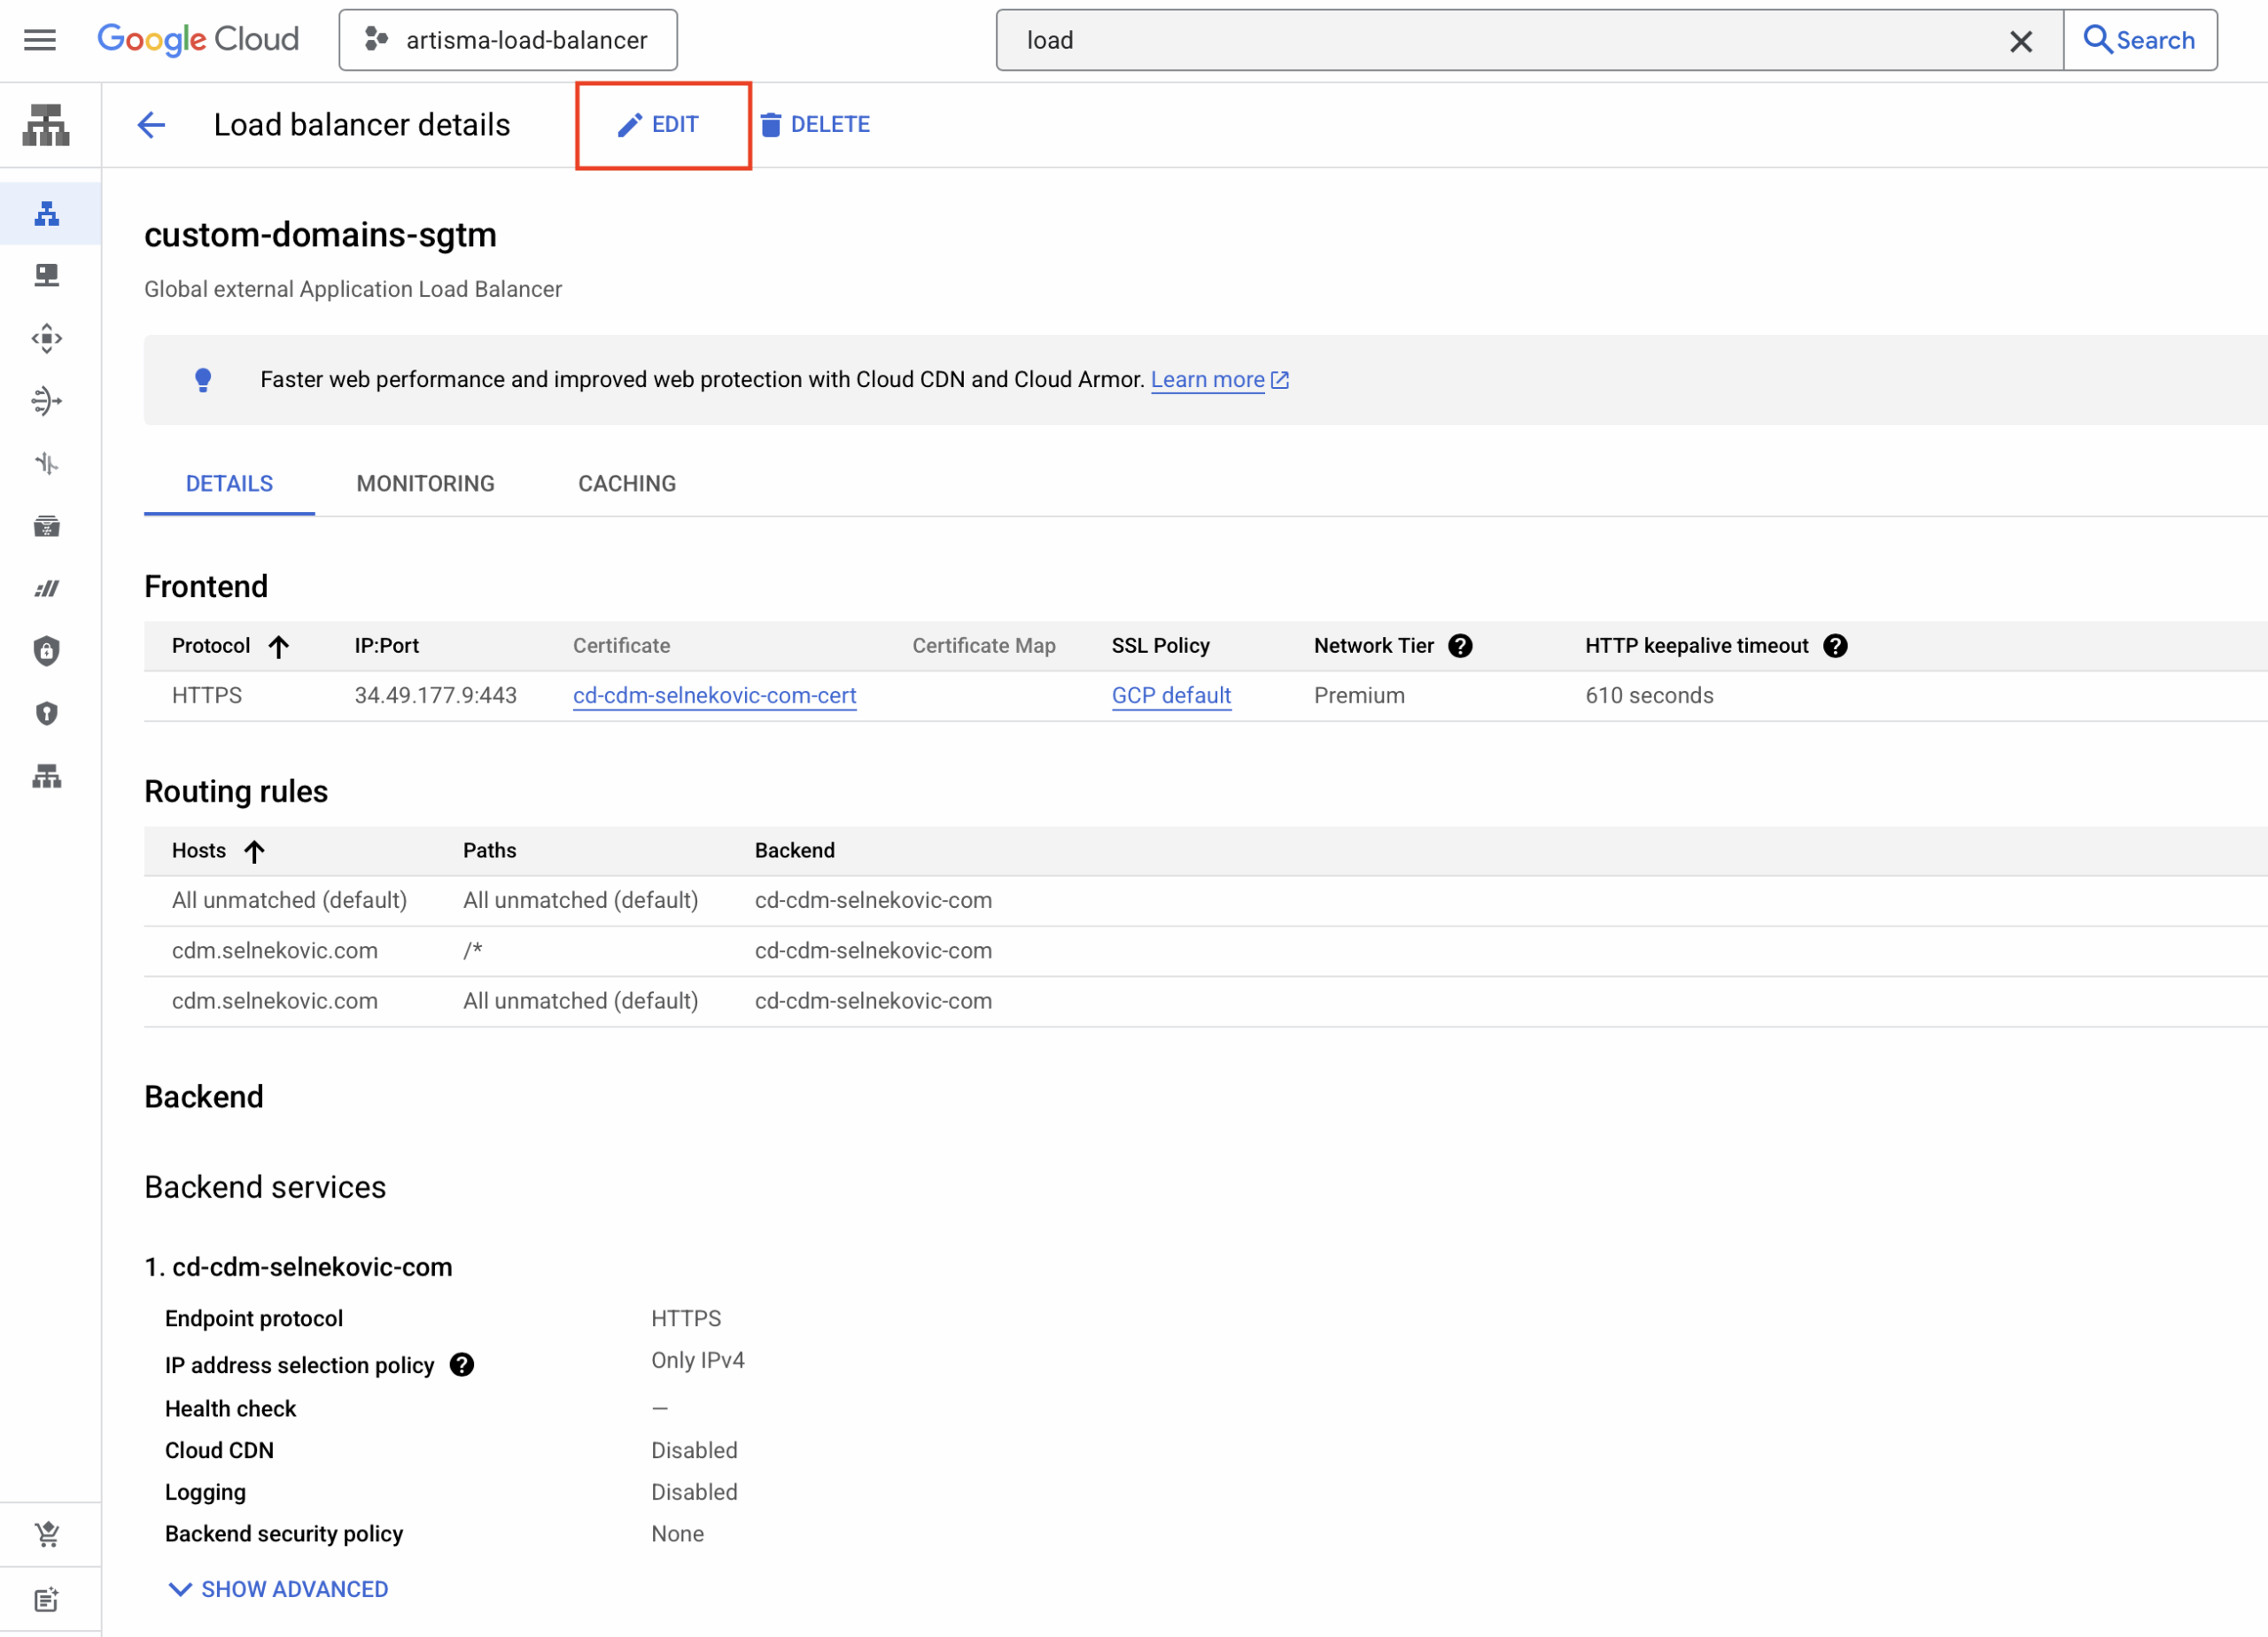
After creating the Load Balancer, you can edit routing rules:
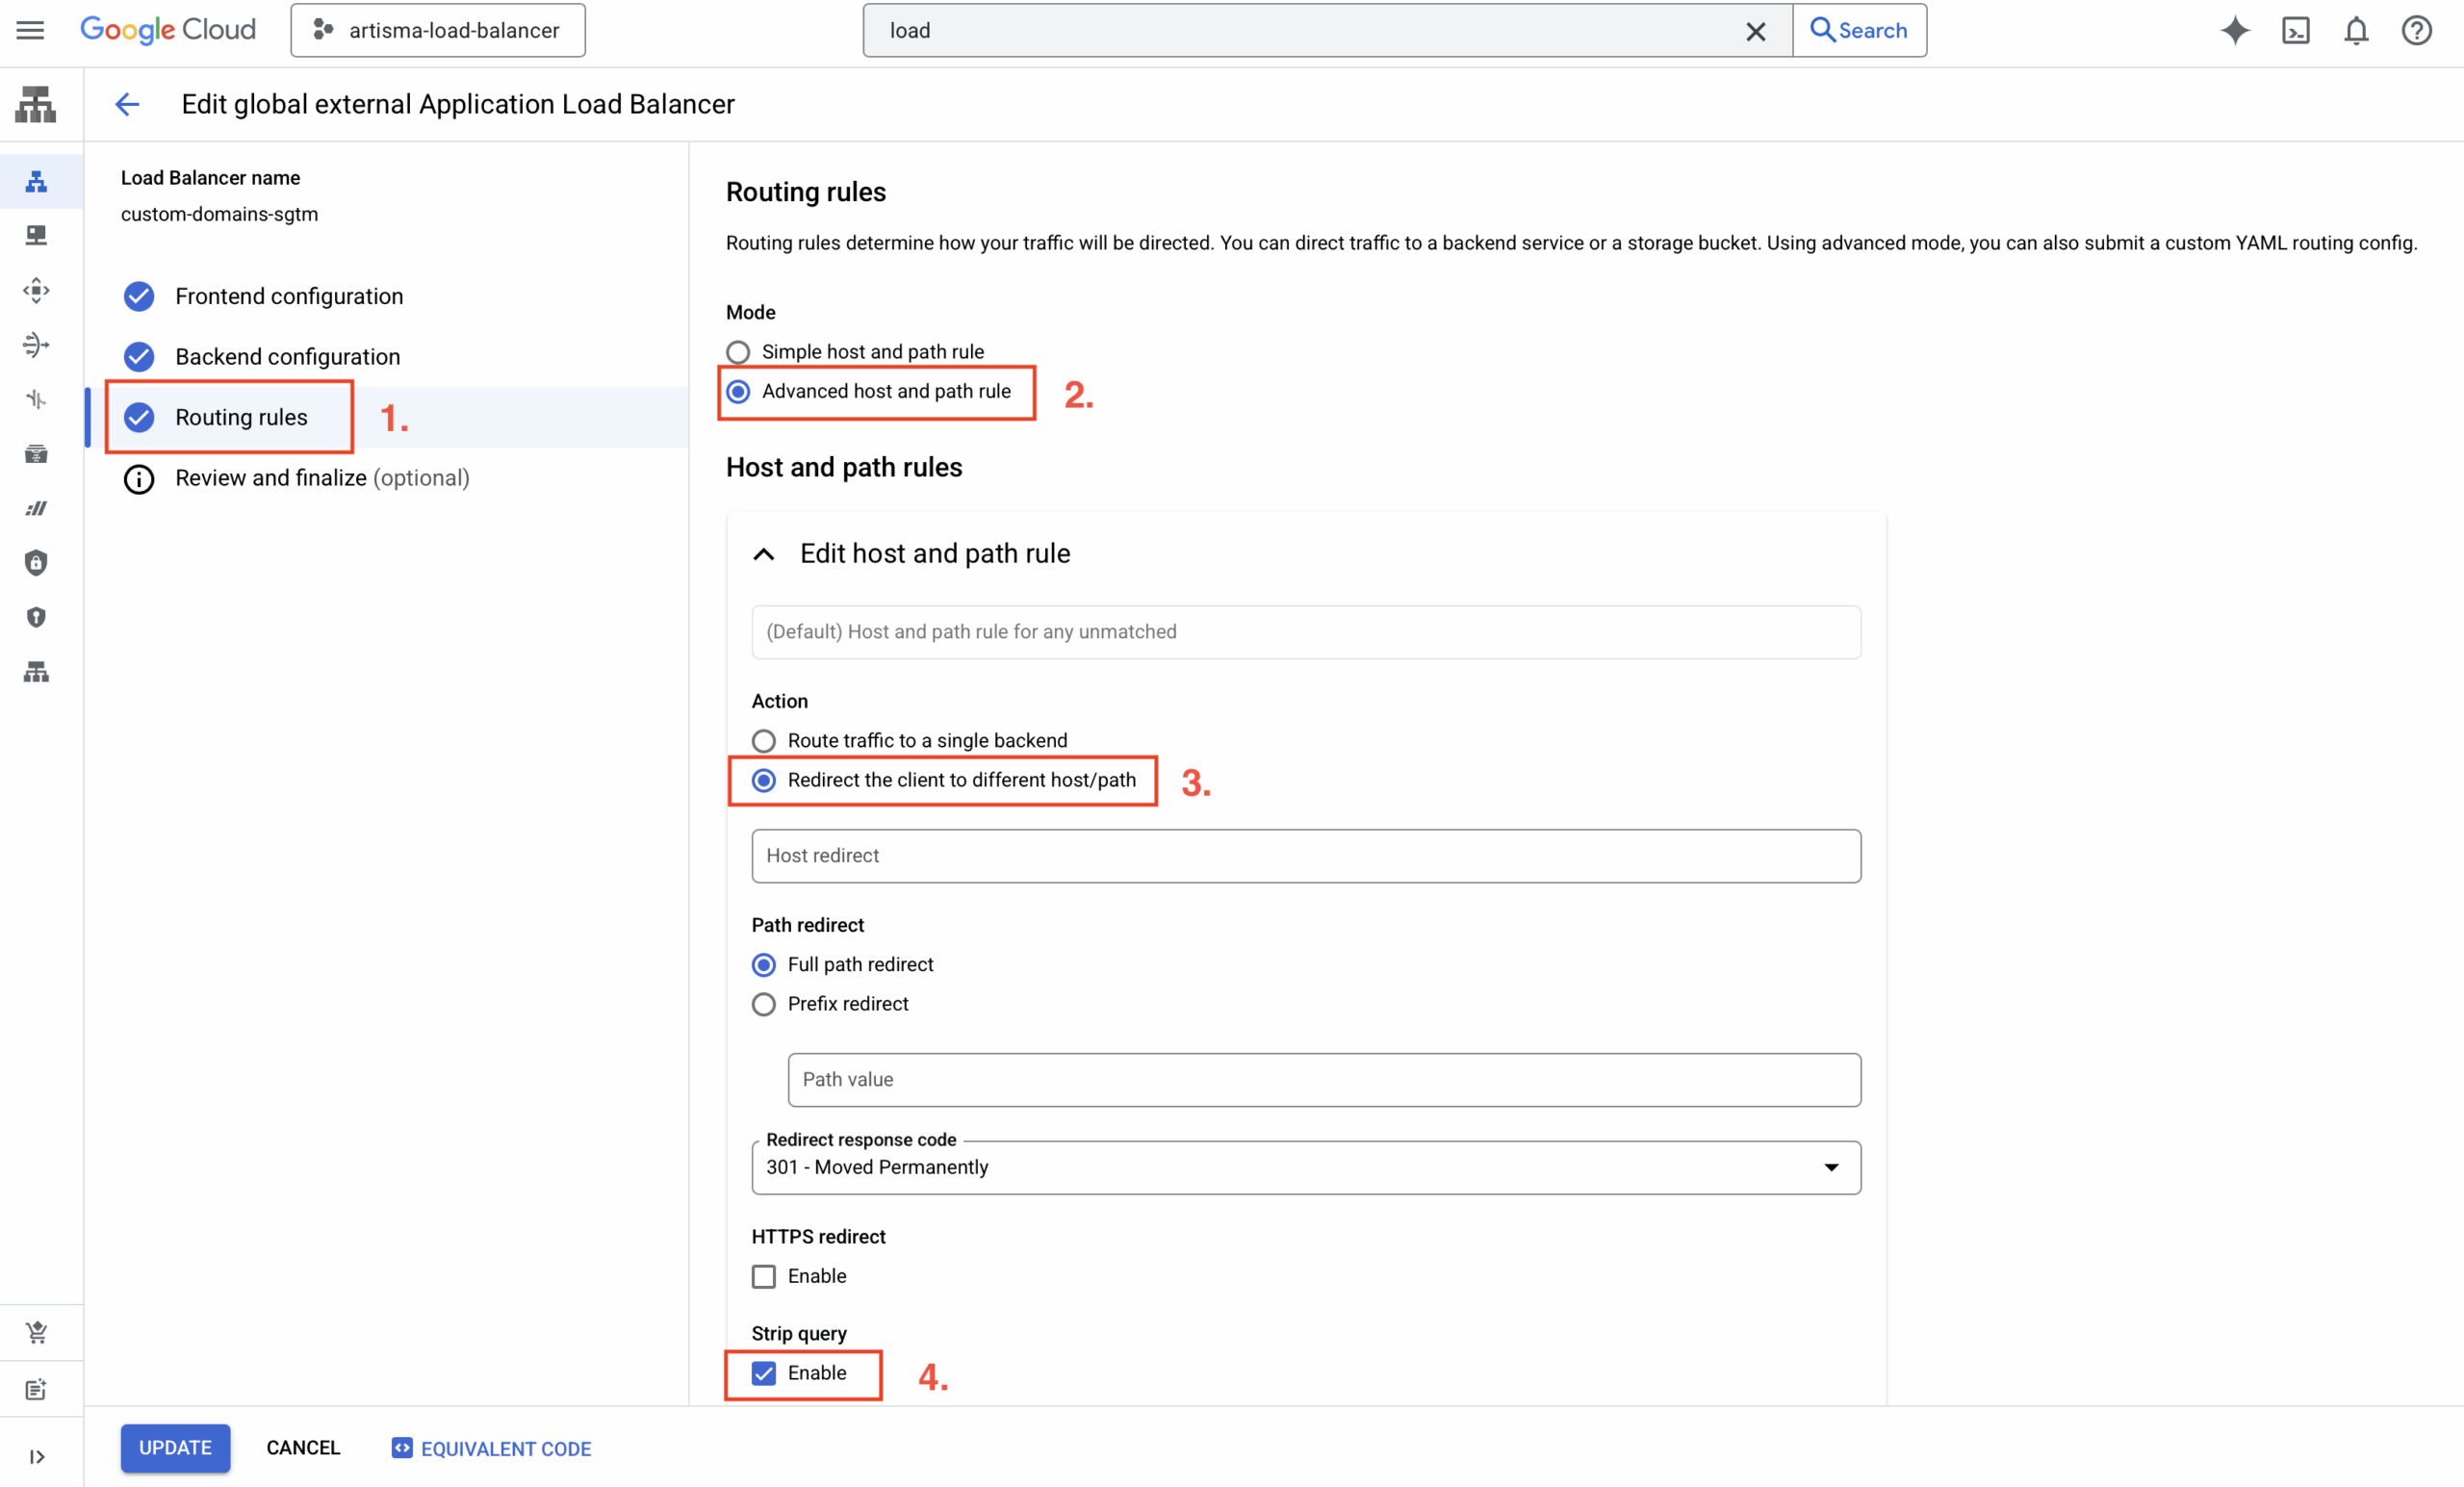
- Go to Load Balancing > Edit > Routing Rules
- Select Advanced host and path rule
- Set up a rule to redirect traffic for unmatched hosts to a default domain or path
It is useful if you want to catch typos or generic traffic on other domains. And that’s how the Load Balancer with Google’s integration was set up before


4. Add more domains
Need to add another domain? Just run the script again, fill in the domain, backend, and region, and choose Option 2: Add new domain.
Do not forget to add the IP address to your domain’s DNS records as an A record.
⚠️ Note: This only works if the Load Balancer was originally created with this script. Re-using the exact setup ensures consistency and compatibility.
Code explanation
Below is the explanation of the gcloud commands used in the script, along with short descriptions for each function.
create_global_ip()
Creates a global external IPv4 address using the premium network tier. This IP address is used later to create the forwarding rule and map a custom domain to the load balancer.
create_global_ip() {
    gcloud compute addresses create "${_IP_ADDRESS_NAME}" \
        --network-tier=PREMIUM \
        --ip-version=IPV4 \
        --global
}
create_ssl_certificate()
Generates a global SSL certificate for the given domain. Required for enabling HTTPS connections through the load balancer with a valid certificate.
create_ssl_certificate() {
    gcloud compute ssl-certificates create cd-${_DOMAIN}-cert \
        --domains="${domain}" \
        --global
}
create_network_endpoint_group()
Creates a Serverless Network Endpoint Group (NEG) linked to a Cloud Run service in a specific region. NEGs are a way to logically group the backend endpoints that serve your application traffic.
create_network_endpoint_group() {
    gcloud compute network-endpoint-groups create cd-${_DOMAIN}-neg \
        --region=${_REGION} \
        --network-endpoint-type=serverless \
        --cloud-run-service=${_BACKEND_SERVICE}
}
create_backend_service()
Creates a global HTTPS backend service with the load balancing scheme set to EXTERNAL_MANAGED. It acts as the target that receives traffic from the URL map.
create_backend_service() {
    gcloud compute backend-services create cd-${_DOMAIN} \
        --load-balancing-scheme=EXTERNAL_MANAGED \
        --protocol=HTTPS \
        --port-name=http \
        --global
}
add_backend_to_service()
Adds the previously created NEG to the backend service. This connects the backend (Cloud Run service) to the load balancer configuration.
add_backend_to_service() {
    gcloud compute backend-services add-backend cd-${_DOMAIN} \
        --global \
        --network-endpoint-group=cd-${_DOMAIN}-neg \
        --network-endpoint-group-region=${_REGION}
}
create_url_map()
Creates a URL map that routes all traffic (/*) to the default backend service. URL maps define how incoming requests are routed based on host and path rules.
create_url_map() {
    gcloud compute url-maps create ${_URL_MAP} \
        --default-service=cd-${_DOMAIN}
}
add_path_matcher_to_url_map()
Adds a path matcher and host rule to the URL map for the custom domain. Ensures requests to the specified domain go to the correct backend.
add_path_matcher_to_url_map() {
    gcloud compute url-maps add-path-matcher ${_URL_MAP} \
        --path-matcher-name=${_DOMAIN} \
        --default-service=cd-${_DOMAIN} \
        --path-rules=/*=cd-${_DOMAIN} \
        --new-hosts=${domain}
}
create_https_proxy()
Creates a target HTTPS proxy that links the SSL certificate and URL map. The proxy handles incoming HTTPS requests and directs them based on URL map rules.
create_https_proxy() {
    gcloud compute target-https-proxies create ${_URL_MAP}-proxy \
        --ssl-certificates=cd-${_DOMAIN}-cert \
        --url-map=custom-domains-sgtm
}
create_forwarding_rule()
Creates a global forwarding rule on port 443 using the HTTPS proxy and IP address. This is the final step in exposing the load balancer to the internet via HTTPS.
create_forwarding_rule() {
    gcloud compute forwarding-rules create ${_URL_MAP}-fwr \
        --load-balancing-scheme=EXTERNAL_MANAGED \
        --network-tier=PREMIUM \
        --address=${global_ip} \
        --target-https-proxy=${_URL_MAP}-proxy \
        --global \
        --ports=443
}
update_https_proxy()
Appends a new SSL certificate to an existing HTTPS proxy.
update_https_proxy() {
    local proxy_name="custom-domains-sgtm-proxy"
    local new_cert="cd-${_DOMAIN}-cert"

    echo "Retrieving existing certificates from HTTPS proxy: $proxy_name..."

    existing_certs=$(gcloud compute target-https-proxies describe "$proxy_name" \
        --format="value(sslCertificates[])")

    if [[ -z "$existing_certs" ]]; then
        echo "⚠️  No existing certificates found on the proxy."
        kill -INT $$
    else
        cleaned_certs=$(echo "$existing_certs" | sed 's|.*/||g' | paste -sd, -)
        all_certs="${cleaned_certs},${new_cert}"
    fi

    echo "Updating HTTPS proxy with certificates: $all_certs"

    gcloud compute target-https-proxies update "$proxy_name" \
        --ssl-certificates="$all_certs"
}
Wow, you read it to the end 😉 Great!


