ga4 internal traffic filtering with traffic type marker
published 2025-07-20 · ga4 gtm chrome-extension · [link]
How to filter internal website traffic when a client doesn’t have a static IP address? It’s a common challenge in digital analytics. The answer is simpler than you might think. If you’re not using static IP addresses or a VPN, there are straightforward solutions using browser extensions that mark internal traffic directly in the browser.
But which extension to choose? I couldn’t find an existing solution that was both simple and flexible enough. Companies I work with use various parameters, not just internal or developer, to filter traffic. So I built my own Chrome extension: Traffic Type Marker.
But let’s go from the beginning.
Table of contents
Why Filtering Internal Traffic Matters
Excluding your team’s or agency’s activity from analytics isn’t just about tidiness:
- More accurate data: The activities of employees, developers, and agency partners can significantly skew KPIs, especially with a large team or frequent testing of new interfaces.
- Cleaner attribution: Internal hits can inflate the “(direct) / (none)” channel and muddy what truly drives results.
- Advanced use cases: You may want to trigger, block, or redirect events based on traffic type—e.g. block marketing tags for internal users or send developer events to a separate testing property.
Before you set up filtering in Google Analytics, remember:
- Filters are not retroactive. They only apply to data collected after they are activated. Historical data stays unchanged.
- Activation is permanent. Once a filter is set to “Active,” the excluded data is gone. You cannot recover it. Test every filter before fully activating it.
Standard Filtering in Google Analytics 4
By default, GA4 offers two traffic types: Internal and Developer. When you define internal IP addresses (or a range) in GA4, the tracking code adds a special parameter to every hit from that IP:
- For internal traffic:
tt=internal - For developer traffic (e.g. GTM DebugView):
_dbg=1
Developer traffic appears in GA4 DebugView; correctly configured internal traffic does not show in reports at all.
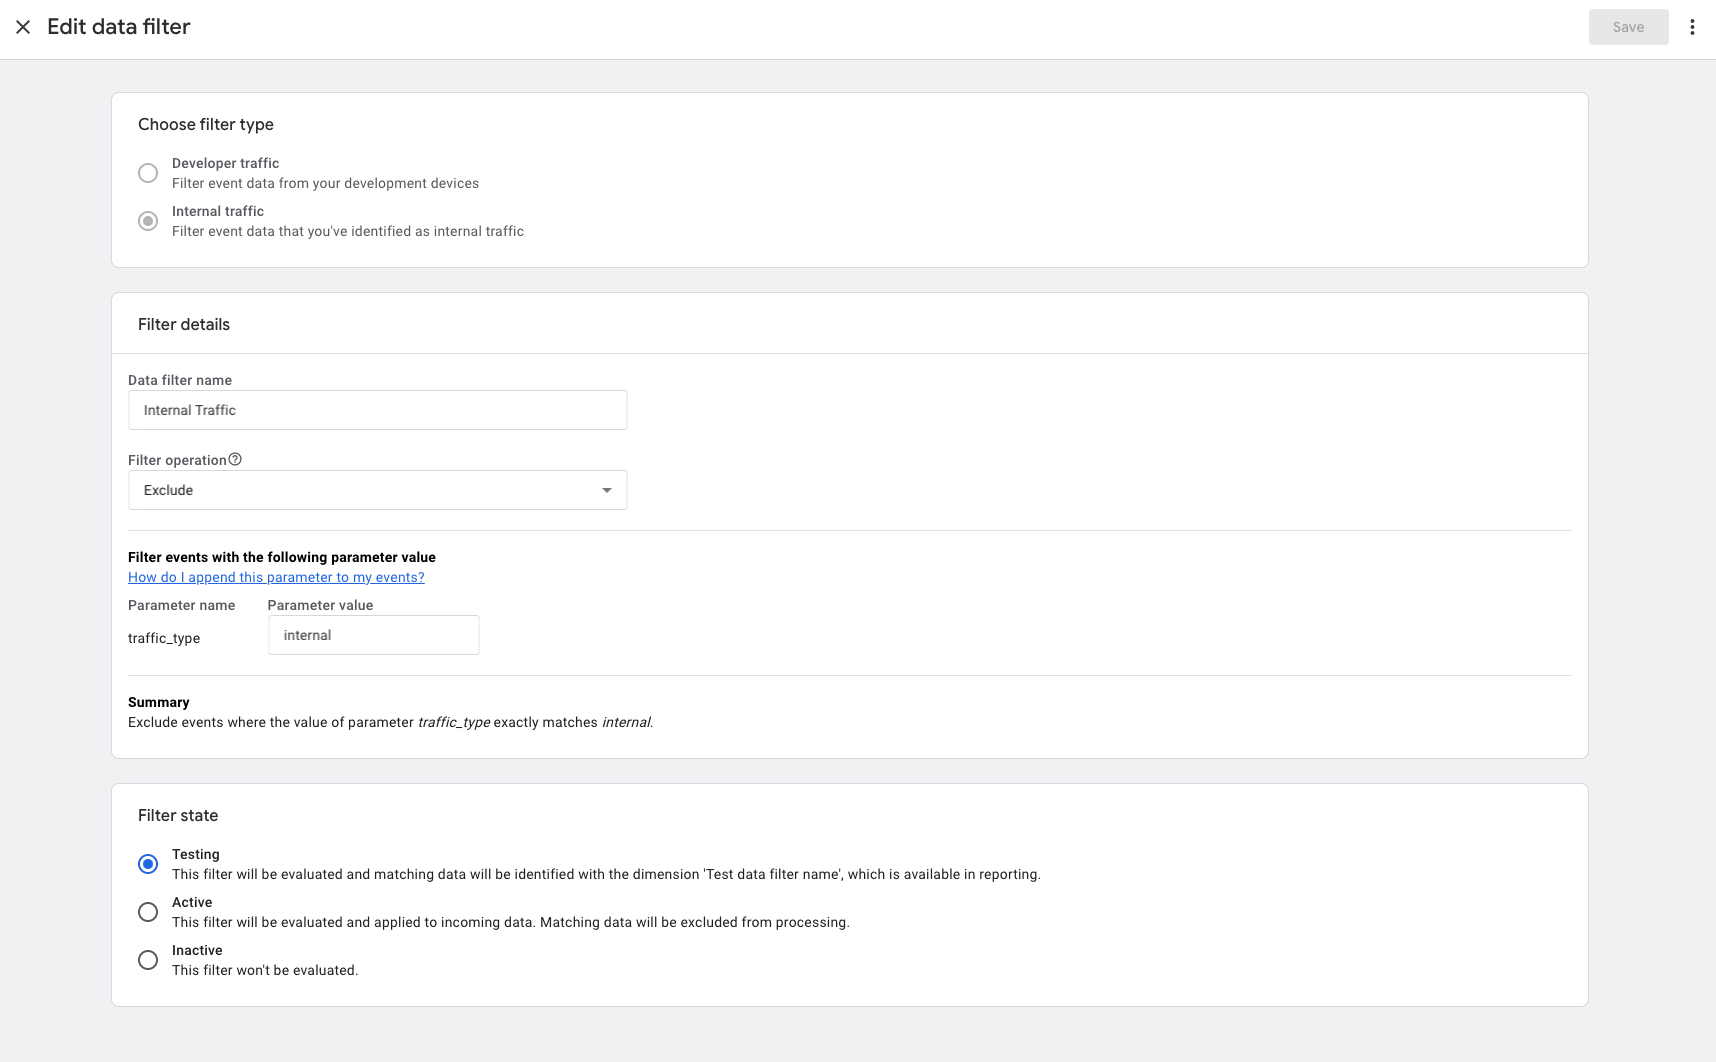
How to set up IP-based filtering in GA4
- Go to Admin → Data Streams and select your web stream.
- Click Configure tag settings.
- Select Define internal traffic.
- Create a rule: name it and enter the IP addresses (or use a regex for a range).
- Activate the filter: Admin → Data Filters. Filters can be Testing (data marked but not excluded), Active (data excluded), or Inactive.
Managing traffic_type with GTM
Defining IPs only in GA4 is limiting. A more flexible approach is to manage the traffic_type parameter in Google Tag Manager. You can use a Regex Table variable (or similar) to set custom values such as office, consultant, or agency. Benefits:
- Set
traffic_typeto custom values. - Block not only GA4 but also marketing tags (e.g. Facebook Pixel, Google Ads).
- Send events to a separate test GA4 property.
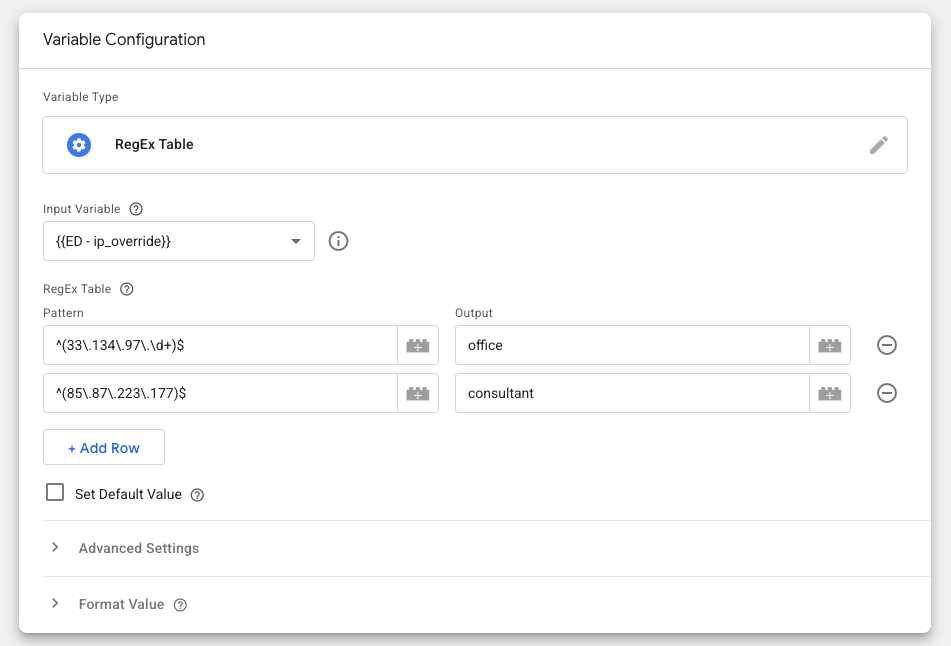
With this method, the IP is still the source of truth, but handling is more flexible. In server-side GTM, every event can include an ip_override parameter that you can use for filtering.
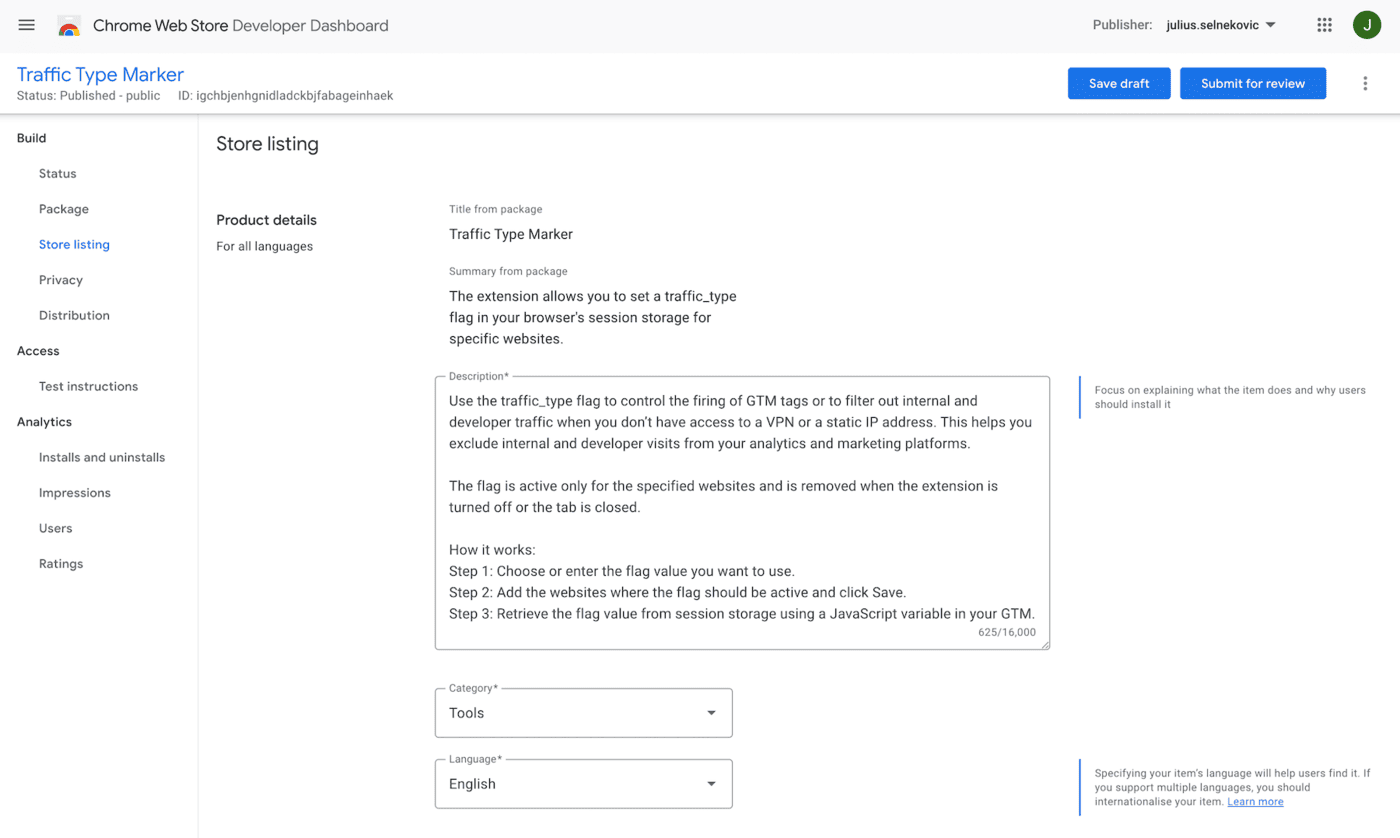
Traffic Type Marker
What if you don’t have a static IP? Traffic Type Marker solves that. The extension stores a flag you define (e.g. internal, client, or any custom value) in the browser’s Session Storage for the domains you choose. You can pick a predefined value or set your own.
In GTM, add a Custom JavaScript variable that reads that flag from Session Storage. Use the returned value to set the traffic_type parameter, block tags, or drive other logic. Example:
function() {
  var trafficTypeMarker = sessionStorage.getItem('traffic_type');
  if (trafficTypeMarker) {
    return trafficTypeMarker;
  }

  if ({{Debug Mode}}) {
    return "developer";
  }

  return null;
}
Replace {{Debug Mode}} with your GTM variable that indicates debug mode if you use one.
Setup is simple for the end user: you configure the logic in GTM; they install the extension, set their traffic type, and enable it. No static IP is required.
Building an extension
A simple Chrome extension can be built with a few files:
manifest.json— extension metadatapopup.html— settings window layoutpopup.css— styling- JavaScript — logic and functionality
To test locally, open chrome://extensions, enable Developer mode, and use Load unpacked to select your project folder. After code changes, click Reload on the extension card. You don’t have to publish to the Chrome Web Store to use it, but publishing (after a one-time $5 developer fee) makes it available to others. Review for Traffic Type Marker took a few days; updates are typically approved faster.
Final Thoughts
Clean, reliable data matters—every decision builds on what you collect. Filtering out internal traffic is an important step to keep that foundation solid. Traffic Type Marker was built to be a simple, flexible way to handle this when static IPs aren’t an option. Try the Traffic Type Marker extension and see how it fits your team’s workflow.